 |
|
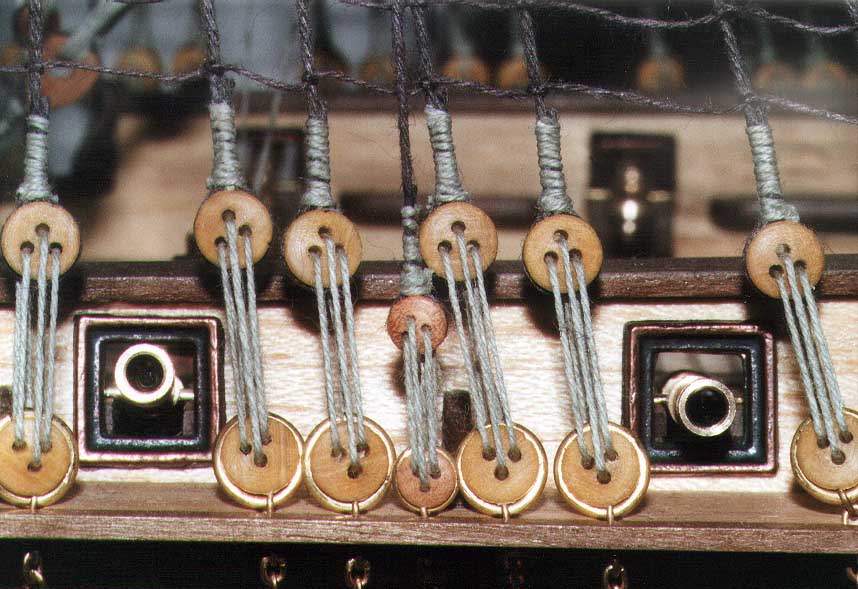
Pic 68: A close-up of the finished deadeyes. You can see how the brass rings fit snugly round the lower blocks despite the chain being fitted (see Pic 50 on how to achieve this). From the upper blocks, the shrouds run up to the platform, or 'top'. Shrouds are made in pairs (see Pic 69), so the first block of each pair can be fixed off-ship using the whipping method mentioned earlier. The grey thread that connects the first upper and lower block is then added, adjusted to give the correct visual gap between the blocks, and tied off above the top block. The other end of the shroud is looped around the mast, adjusted for length and secured to its deadeye 'on-ship'. That's the stage where you need to put some (symmetrical) tension on the shrouds. With a bit of fiddling, you will learn how to juggle shroud length and tension to keep the gap between the blocks fairly constant.
It is here that even the slimmest fingers start to look like marrows, so buy two pairs of fine tweezers/forceps if you haven't already got them. They are vital for this kind of rigging, and there's plenty more to come.
If the grey thread won't go cleanly through the holes, add a smear of PVA to the end and smooth the thread into a point. After a few moments you can use it like a needle!
![]()
![]()