 |
|
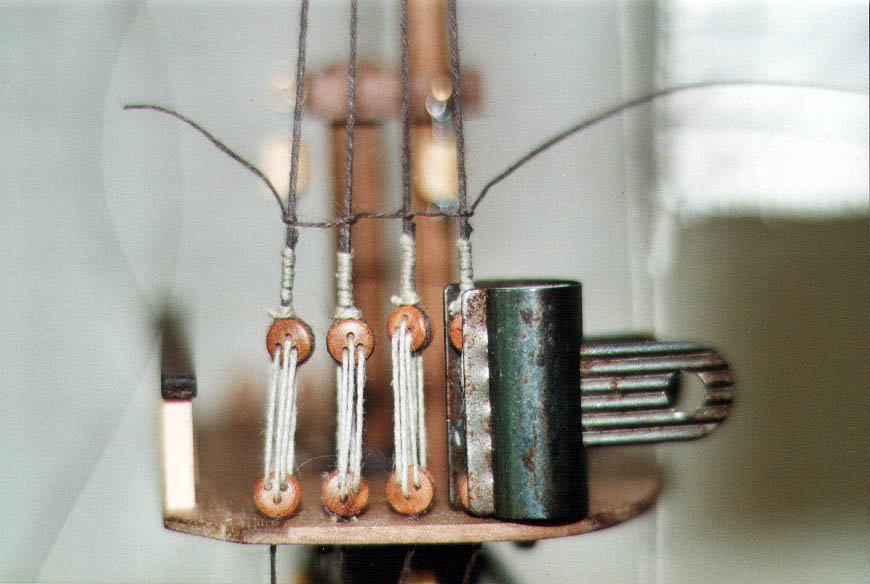
Pic 71: Ratlines are the horizontal threads that run across the shrouds to make rope ladders, used by the crew to get to the sails and lookouts. You haven't seen the lower shrouds yet because I was probably concentrating too much to worry about photos at the time. This photo shows the upper shrouds on the mizzenmast.
Some jobs in model making are hard but interesting. Some jobs are dull but quick. Ratlines are very difficult, very dull and very slow. They took me a month.
Tips for ratlines: You won't do them quickly, so prepare for a long haul. They are tied on to every shroud as they pass across with a simple crossover knot (half a granny or reef knot). The photo shows the first ratline on the mizzen mast upper shrouds. The first ratline of each set also controls the twist of the shroud and hence also the angle of the upper block in the deadeye. Here, the clip is holding the deadeye in line as the first ratline is knotted. The lower block is glued to the platform so you can work upwards from a fixed point that doesn't swivel. There is only one blessing - the thread supplied is slightly 'hairy' and this means the knots won't loosen when you let go.
The key now is TENSION between the shrouds. If you apply any tension at all on the ratline, the shrouds will get pulled together and look horrible. It can happen imperceptibly as successive ratlines are added, so watch out. Conversely, if you leave it too slack, you get a U-shape which looks bad too. In short, each knot must be placed within about 0.5mm horizontally. I found I could do this by leaving the knot loose, putting tweezers into the loop and gently pulling it sideways along the ratline as required. As the knot tightens, the scope for adjustment decreases until, with practice, the knot tightens in just the right place. If one does go wrong, you can loosen it a little with the tweezers and move it a bit.
Don't forget that all these knots take up thread. You need to allow 50% more than the width of the shrouds, plus at least another inch for tying the end. On several occasions I ran out just at the end and had to replace the entire ratline...
Finally, the knots at each end can be glued and the excess thread cut off with sharp, fine scissors.
As you proceed laboriously up each set of shrouds, keep checking for 'in-pulling' - it sneaks up on you. A little in-pulling can be corrected using two pairs of tweezers to stretch the ratline between each knot, but this is a very slight adjustment. Also check that each ratline is level and parallel, and correctly spaced above its predecessor - at least they are easy to slide up and down the shrouds for vertical adjustment. After 2,254 perfectly spaced knots you will be finished (literally!) but your model will look great!
![]()
![]()